Neo 2 Guide for Forest Monitoring in Extreme Temperatures
Neo 2 Guide for Forest Monitoring in Extreme Temperatures
META: A practical Neo 2 guide for forest monitoring in harsh weather, covering obstacle avoidance, imaging workflow, thermal pairing, transport, and field techniques inspired by proven power inspection drone systems.
I spend a lot of time thinking about what makes a drone genuinely useful outside a demo reel. Forest monitoring is where the difference shows up fast. Beautiful footage is easy on a calm day in open space. Useful aerial data in freezing air, uneven light, heavy canopy edges, and cluttered terrain is harder. If you are planning to use Neo 2 for forest observation, habitat checks, tree stress review, or seasonal change tracking, the real question is not whether it flies. The question is whether it can stay predictable when the environment stops cooperating.
A useful way to think about Neo 2 is through lessons already proven in another demanding civilian field: powerline inspection. The reference system behind this article was built for operators working close to towers, wires, wind, and electromagnetic interference. Forest monitoring is different, but the operational pressures overlap in meaningful ways. Dense obstacles. Limited landing options. Cold mornings. The need to detect small details from a safe stand-off distance. Those are not abstract concerns. They shape every flight decision.
Why extreme-temperature forest work changes the drone checklist
When people prepare for forest monitoring, they often start with camera specs. That matters, but environmental resilience comes first. In very cold conditions, a flight can fail long before image quality becomes the bottleneck. Battery behavior changes. Surfaces collect moisture. Fingers lose dexterity. Flight time becomes less theoretical and more precious.
One reference detail stands out here: the source system used self-heating batteries for low-temperature work. That is not a flashy feature, but it is operationally significant. In a forest monitoring workflow, battery temperature affects takeoff consistency, voltage stability, and how confidently you can hold position while framing a target under canopy gaps. If your Neo 2 setup includes battery management practices or accessories designed to preserve pack temperature before launch, treat that as mission-critical, not optional.
The second detail that matters is weather tolerance. The referenced inspection platform carried an IP43 protection rating and was designed to keep flying in harsh conditions. For forestry users, the lesson is straightforward: even if Neo 2 is lighter and designed for a different class of operation, your planning should borrow that same mindset. Cold air often arrives with mist, frost, blowing debris, and sudden gusts at tree line transitions. You should not interpret “extreme temperatures” as just a battery problem. It is a whole-airframe problem.
Build your Neo 2 workflow around stand-off observation
Forest monitoring rarely rewards aggressive flying. You do not need to press deep into branches to collect useful data. In fact, one of the strongest lessons from utility inspection is that stand-off distance protects both aircraft and mission quality.
The reference material notes that a zoom-equipped visible camera could capture pin-level detail from 10 meters away from a tower. The exact target is different in a forest, but the principle transfers extremely well. If Neo 2 is being used to inspect bark damage, canopy discoloration, storm breakage, nesting zones, or disease markers near inaccessible slopes, keeping distance while pulling in detail is often the smarter move. It reduces collision risk, protects wildlife areas from unnecessary disturbance, and gives the pilot more room to recover if wind or GPS behavior shifts around the trees.
This is where obstacle avoidance becomes more than a spec-sheet keyword. In cluttered woodland margins, front-facing awareness is especially useful when you are backing out from a framing position or creeping laterally along a canopy edge. The inspection source emphasized front FPV visibility and forward obstacle sensing as safety tools. For a Neo 2 operator, the practical takeaway is to use obstacle avoidance as a buffer, not a crutch. Stay far enough from trunks and branches that the system has time to help you, then use smooth control inputs to keep the aircraft in a predictable corridor.
Step 1: Plan the route before you even power up
The source system supported pre-entered coordinates and virtual geofencing to automate corridor inspections while avoiding towers and lines. Forestry teams can adapt this same logic for repeatable surveys.
For Neo 2, create route plans around fixed natural references: trail intersections, ridge lines, stream bends, fire breaks, or marked plot boundaries. If your app supports waypoint logic, geofences, or repeatable flight paths, use them. If not, build your own repeatability with map markers and altitude notes.
Why this matters:
- Seasonal forest monitoring only works if you can compare like with like.
- Repeatable flight paths reduce pilot workload in cold conditions.
- Predefined boundaries help avoid sudden incursions into dense branches or no-fly habitat zones.
- Consistent geometry improves change detection in canopy density and color.
If your operation involves partner teams or remote consultation, it can help to discuss route setups and accessory compatibility in advance; I usually suggest operators message a drone workflow specialist here before committing to a field kit.
Step 2: Choose the right visual profile for tree health work
A lot of aerial forest content looks dramatic but tells you very little. For monitoring, visual discipline matters more than cinematic instinct.
The reference system paired a 4/3 sensor with 20.8 MP resolution and 4K capture. That combination mattered because inspection work often needs both overview context and the ability to revisit small details. Neo 2 users should apply the same thinking even if the sensor format differs. You want enough resolution to identify subtle structural or color changes, but you also want settings that preserve grading flexibility across mixed lighting.
This is where D-Log can be useful. Forests create brutal contrast transitions: bright canopy, shaded understory, reflective water, patchy snow, low-angle winter sun. If Neo 2 supports D-Log or a flat profile, use it for documentation flights where post-processing consistency matters. It gives you more room to normalize repeated survey sets over time.
A practical note from the field: if a third-party anti-glare monitor hood or a high-brightness tablet mount improves your screen readability, it is worth carrying. The source equipment featured a 7.85-inch monitor with 2000 cd/m² brightness for use in strong light. That detail may sound peripheral, but in forest work it is not. Screen visibility affects branch separation, exposure judgment, and your ability to confirm whether what looks like canopy stress is real or just a shadow transition. One of the simplest capability upgrades I have seen is a rugged third-party sun hood paired with a stable controller mount. It sounds mundane. It makes a difference.
Step 3: Use tracking features carefully, not casually
ActiveTrack and subject tracking can be genuinely useful in forest work, but only in the right scenarios. I would not use them blindly around dense canopy or erratic vertical obstacles. I would use them for edge-of-forest movement patterns, follow documentation along service tracks, or repeat passes over moving civilian field teams such as ecologists walking transects.
The value is workload reduction. In the cold, manual control precision drops faster than most pilots admit. Tracking modes can free up attention so you can monitor spacing, obstacle alerts, and framing. But the operational rule is simple: do not let automation choose a path through branches you would not manually choose yourself.
QuickShots and Hyperlapse fit a narrower role. They are not core monitoring tools, but they can support stakeholder communication. A Hyperlapse from the same overlook across weeks can visualize snow melt, storm impact, or leaf progression. QuickShots can help create orientation clips for training teams before they enter a site. Use them as supplements, not substitutes, for disciplined survey capture.
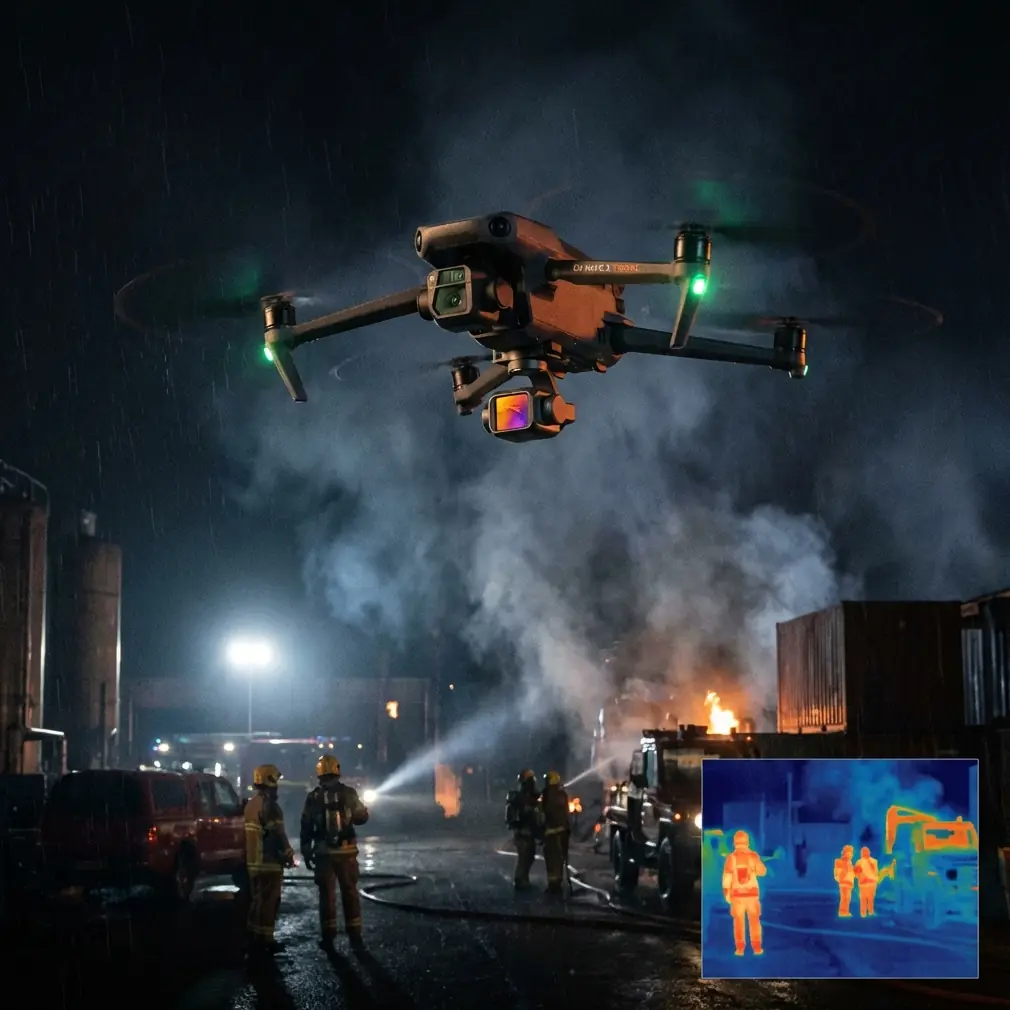
Step 4: Pair visible imagery with thermal thinking
One of the most valuable reference insights comes from the thermal payload. The cited inspection solution used a thermal camera with 640 × 512 resolution and sensitivity below 50 mK. That level of sensitivity was highlighted because it could pick up small temperature differences at distance.
Forest monitoring teams should pay attention to the idea, even if Neo 2 itself is not carrying that exact sensor. Thermal data becomes especially useful in cold environments because temperature contrast can reveal patterns the visible camera misses: stressed trees, lingering moisture zones, drainage paths, wildlife heat signatures during approved survey work, or hotspots linked to early-stage smoldering after a lightning event in civilian land management contexts.
The operational significance is timing. Thermal work should be scheduled when environmental contrast helps, not hurts. A cold morning after a stable night can reveal subtle anomalies better than a mixed midday sun pattern. Conversely, if branches have just started warming unevenly, you may misread what you see. The source thermal system also emphasized image processing quality. That matters because thermal interpretation is only as good as your consistency in capture, calibration, and review.
Step 5: Respect wind at canopy transitions
The reference aircraft was rated for wind up to 10 m/s, roughly level 5 wind. That is a useful benchmark not because Neo 2 shares the same envelope, but because it reminds operators to think in layers. Wind in a parking area is not the same as wind above a ridge, beside a cut line, or spilling over tall conifers.
In forests, air can go from still to turbulent within a few meters of altitude change. Plan test hovers at multiple heights before you commit to a route. Watch how the aircraft behaves at the canopy edge. If your footage jitters, your margins are shrinking. If the drone has to work hard just to hold position, you are spending battery on stability instead of data collection.
This matters even more when temperatures are low. Cold reduces your comfort with hand launches, narrows safe loiter time, and magnifies the consequences of a bad branch encounter. A conservative wind decision saves missions.
Step 6: Transport matters more than people think
The reference platform was foldable, transport-friendly, and light enough for one-person carry at 5.0 kg. Again, Neo 2 sits in a different class, but the lesson is excellent for forest work. The most useful drone is the one that reaches the launch point without turning setup into a burden.
For forest monitoring, I prefer a compact field kit built around three ideas:
- One-person deployability
- Warm battery storage before launch
- Fast transitions between observation points
That means stripping out nonessential gear, protecting props and sensors during vehicle transport, and using a case layout that lets you launch quickly without exposing batteries to cold for longer than needed. When the route includes hiking or repeated stop-and-go checks, small efficiencies become real endurance gains.
Step 7: Divide pilot and camera tasks when the mission justifies it
The source system supported dual control, allowing one operator to fly while another controlled the gimbal. That feature is often ignored outside high-end operations, but it solves a real problem: trying to fly safely and observe carefully at the same time.
For Neo 2 teams working on forestry documentation, a two-person workflow can elevate both safety and data quality. One person manages altitude, spacing, and obstacle awareness. The other watches for bark splits, crown thinning, storm scars, or thermal anomalies. In dense environments, that division of labor is not luxury. It is risk management.
Even if your setup does not support formal dual control, you can mimic the benefit with verbal role separation. One person calls navigation priorities. The other calls image priorities. Keep it structured and calm.
What this means for Neo 2 in real forest conditions
If you strip away marketing language, the strongest case for Neo 2 in forest monitoring is not about flashy autonomy. It is about building a reliable small-aircraft workflow inspired by systems that were designed for hard inspection environments.
The reference facts point to a few principles that hold up extremely well:
- Low-temperature readiness matters as much as camera quality.
- Stand-off imaging is safer and often more informative than close-in flight.
- Obstacle awareness should support planning, not replace it.
- Route repeatability improves the value of every monitoring mission.
- Thermal thinking, where available, can reveal what visible imagery cannot.
- Bright-display and third-party viewing accessories can materially improve field decisions.
For a photographer’s eye, that last point deserves emphasis. Forest monitoring is visual work, but not in the artistic sense people assume. You are trying to notice the thing that does not quite fit: a crown fading a week earlier than its neighbors, a drainage pattern shifting after freeze-thaw, a fracture line hidden by contrast, a warm patch where the forest should be thermally uniform. The drone helps, but only if the whole system is built to let you see clearly and fly calmly.
That is the standard I would bring to Neo 2.
Ready for your own Neo 2? Contact our team for expert consultation.