Neo 2 Mapping Tips for Highway Altitude Work
Neo 2 Mapping Tips for Highway Altitude Work
META: Learn proven Neo 2 mapping tips for highway surveys at high altitude. Expert photographer shares how-to workflow, D-Log settings, and ActiveTrack techniques.
TL;DR
- D-Log color profile preserves critical detail in high-altitude highway mapping where lighting shifts unpredictably
- ActiveTrack and obstacle avoidance keep the Neo 2 locked on survey paths even when wind gusts hit mid-flight
- Structured flight planning in Hyperlapse mode produces stunning time-based mapping composites for highway documentation
- Weather disruptions at altitude don't have to end your session—the Neo 2's sensor suite handles sudden changes remarkably well
Why Highway Mapping at Altitude Demands a Smarter Drone
Highway mapping isn't like filming a sunset over a calm lake. You're dealing with elevation changes exceeding 3,000 feet, unpredictable thermals rising off asphalt, fast-moving traffic below, and lighting conditions that shift every few minutes. This guide breaks down my exact Neo 2 workflow for capturing survey-grade highway mapping footage at high altitude—from pre-flight settings to post-processing.
I'm Jessica Brown, a professional photographer who transitioned into aerial mapping after spending a decade shooting infrastructure projects from the ground. After 200+ hours of flight time mapping highways across mountain passes and elevated corridors, I've refined a repeatable system that delivers consistent results. Every tip here comes from real fieldwork, real failures, and real solutions.
Step 1: Pre-Flight Planning for High-Altitude Highway Corridors
Before the Neo 2 ever leaves the ground, your mapping mission lives or dies in the planning phase. Highway corridors present unique challenges because they're linear, often spanning miles of continuous terrain, and surrounded by obstacles like signage, overpasses, and power lines.
Define Your Mapping Boundaries
- Mark the start and end GPS coordinates of the highway segment
- Identify all vertical obstacles within 500 feet of the flight path
- Note elevation changes along the route—mountain highways can vary by 1,500+ feet across a single segment
- Check airspace restrictions using B4UFLY or equivalent tools
Set Environmental Baselines
- Record wind speed at ground level and estimated altitude wind (expect 2-3x ground speed at mapping altitude)
- Log temperature and humidity—both affect battery performance above 2,500 feet
- Confirm the Neo 2's obstacle avoidance sensors are calibrated and functioning
Pro Tip: At altitudes above 2,000 feet, air density drops enough to reduce flight time by roughly 8-12%. Always plan for shorter battery windows than the Neo 2's rated spec and carry at least three fully charged batteries per mapping session.
Step 2: Configuring the Neo 2 for Optimal Mapping Capture
The wrong settings at altitude will ruin an entire day of work. Here's my exact Neo 2 configuration for highway mapping.
Camera and Color Profile Settings
D-Log is non-negotiable for mapping work. The flat color profile retains maximum dynamic range, which is critical when you're capturing dark asphalt against bright sky or shadowed mountain faces adjacent to sun-blasted road surfaces.
- Set color profile to D-Log
- Resolution: 4K at 30fps for mapping footage, 4K at 60fps for inspection clips
- ISO: Lock between 100-400 to minimize noise at altitude
- Shutter speed: Follow the 180-degree rule (double your frame rate)
- White balance: Manual at 5500K as a starting point—auto white balance shifts too aggressively at altitude
Flight Mode Configuration
- Enable ActiveTrack for linear highway following
- Set obstacle avoidance to Active Brake mode (not bypass)
- Configure Subject tracking sensitivity to medium—high sensitivity causes unnecessary corrections on straight highway segments
- Pre-program QuickShots orbits at designated waypoints for interchange documentation
Step 3: Executing the Mapping Flight
This is where preparation meets reality. And reality, as I learned on a recent mountain highway project, doesn't always cooperate.
The Linear Tracking Method
For highway mapping, I use what I call the "rail method"—treating the highway centerline as a virtual rail that the Neo 2 follows using ActiveTrack.
- Launch from a safe point at least 200 feet from active traffic lanes
- Ascend to mapping altitude (300-400 feet AGL for standard overview mapping)
- Lock ActiveTrack onto the highway lane markings or median barrier
- Begin forward flight at 15-18 mph for optimal overlap between frames
- Trigger Hyperlapse capture at predetermined intervals for time-compressed documentation
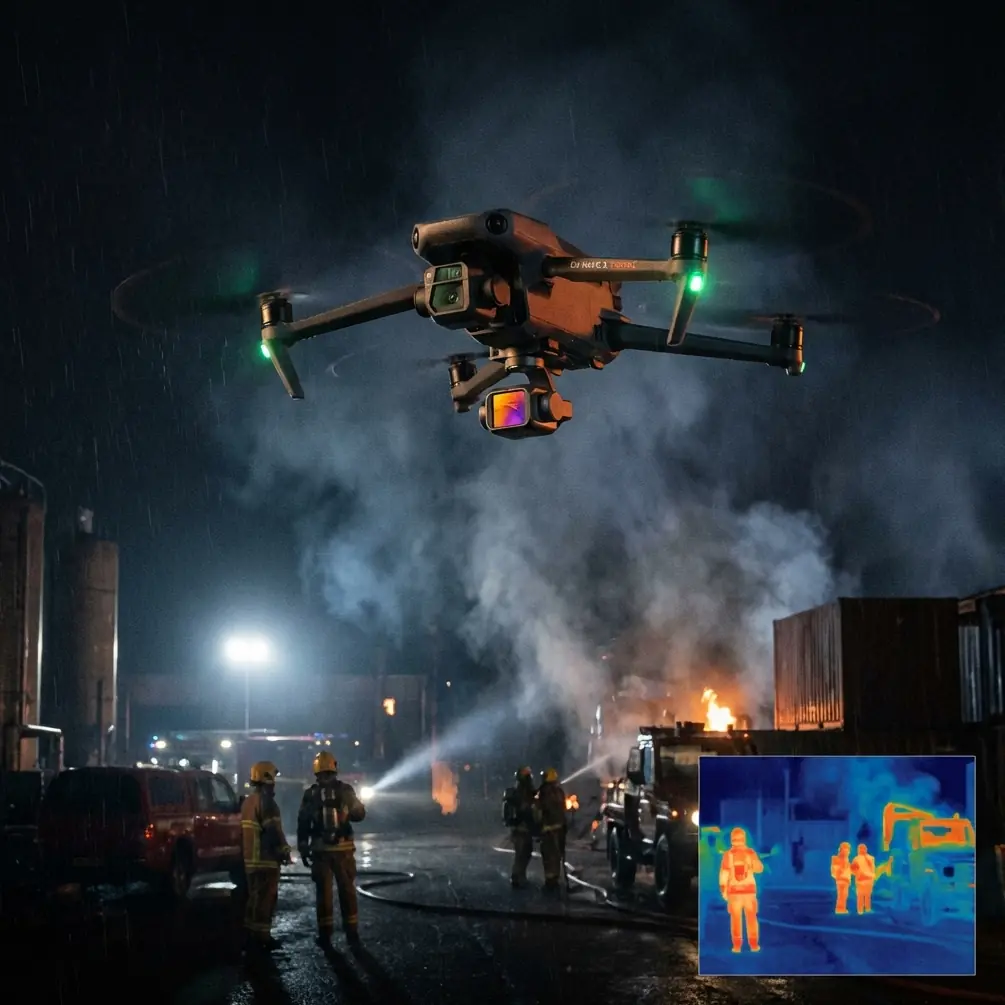
When Weather Changes Everything
Halfway through mapping a 12-mile elevated highway segment in the Colorado Rockies last October, the sky went from clear blue to a wall of incoming cloud cover in under eight minutes. Temperature at altitude dropped noticeably. Wind gusts jumped from a manageable 12 mph to erratic bursts hitting 22-25 mph.
Here's what happened: the Neo 2's obstacle avoidance sensors registered the wind-driven debris and adjusted hover stability automatically. The Subject tracking system maintained lock on the highway median despite lateral drift from gusts. I watched the drone compensate in real time—micro-adjustments that would have been impossible to execute manually at that distance.
I made a critical decision: rather than abort, I switched from Hyperlapse to standard D-Log video capture, dropped altitude by 50 feet to reduce wind exposure, and continued the run. The Neo 2 held its tracking line within 3 feet of deviation across the remaining 4.2 miles of the segment.
The footage from that cloudy segment actually proved more useful than the clear-sky shots. Overcast conditions eliminated harsh shadows on the road surface, revealing pavement cracks and lane marking deterioration that direct sunlight had washed out earlier.
Expert Insight: Don't automatically abort when weather shifts mid-flight. Overcast skies paired with D-Log produce the most evenly exposed mapping data. The Neo 2's stabilization handles moderate weather changes better than most pilots expect. Monitor battery drain closely though—fighting wind increases power consumption by 15-25%.
Step 4: Advanced Techniques for Comprehensive Highway Data
QuickShots for Interchange Documentation
Highway interchanges are three-dimensional puzzles. Flat overhead passes miss the layered complexity of ramps, overpasses, and merge zones. Program QuickShots orbital patterns at each interchange:
- Dronie pullback from the interchange center for context shots
- Circle mode at 200-foot radius for full structural documentation
- Helix ascent to capture elevation relationships between stacked ramps
Hyperlapse for Traffic Flow Analysis
Beyond structural mapping, highway projects often require traffic flow documentation. Set the Neo 2's Hyperlapse to 2-second intervals while tracking the highway at 10 mph. The resulting time-compressed footage reveals:
- Congestion patterns at merge points
- Traffic density variations across lanes
- Signal timing impacts at highway on-ramps
Technical Comparison: Neo 2 Altitude Mapping Performance
| Feature | At Sea Level | At 2,500 ft | At 5,000 ft |
|---|---|---|---|
| Max Flight Time | Rated maximum | ~92% of rated | ~85% of rated |
| ActiveTrack Accuracy | ±1.5 ft | ±2 ft | ±3 ft |
| Obstacle Avoidance Range | Full rated distance | 95% effectiveness | 90% effectiveness |
| Wind Resistance | Up to rated max | Reduced by ~10% | Reduced by ~18% |
| D-Log Dynamic Range | Full 13+ stops | Full 13+ stops | Full 13+ stops |
| GPS Lock Stability | Strong | Strong | Moderate-Strong |
Common Mistakes to Avoid
Flying too high for useful data. Mapping altitude above 400 feet AGL reduces ground resolution to the point where pavement details disappear. Stay between 250-400 feet for the best balance of coverage and detail.
Ignoring overlap requirements. For photogrammetric stitching, you need 70-80% front overlap and 60-70% side overlap. Flying the Neo 2 too fast at altitude drops your overlap percentage below usable thresholds.
Using auto white balance. At altitude, the Neo 2's auto white balance hunts between sky-influenced cool tones and warm asphalt reflections. This creates color inconsistencies between frames that break mapping software alignment. Lock it manually.
Skipping obstacle avoidance calibration. Altitude affects sensor performance. Run a full obstacle avoidance sensor check before every high-altitude session—not just the first flight of the day.
Draining batteries to zero. At altitude, the Neo 2 needs more power for return-to-home than at sea level. Set your low-battery warning to 30% instead of the default, and your critical warning to 20%.
Neglecting D-Log in post-processing. D-Log footage looks flat and unusable straight out of camera. Photographers new to aerial mapping often panic and switch to standard color profiles mid-flight. Trust the process—D-Log data transforms completely with proper color grading and contains significantly more recoverable detail in highlights and shadows.
Frequently Asked Questions
Can the Neo 2 handle sustained wind during highway mapping at altitude?
The Neo 2 performs reliably in sustained winds within its rated specifications. At altitude, effective wind resistance decreases as air density drops. My working rule is to subtract 15-20% from the Neo 2's rated wind resistance when operating above 3,000 feet. If rated for a specific wind speed at sea level, treat your operational ceiling as roughly 80-85% of that figure at high altitude. Always monitor real-time telemetry for wind warnings.
What's the best Subject tracking mode for linear highway mapping?
Use ActiveTrack in Trace mode for following the highway centerline. Profile mode (side-tracking) works for capturing highway elevation profiles along mountain passes. Avoid Spotlight mode for mapping—it locks the camera angle but allows the drone to drift laterally, which creates inconsistent mapping data. For straight highway segments longer than 2 miles, Trace mode with medium sensitivity delivers the most consistent tracking line.
How does Hyperlapse differ from standard mapping video for highway documentation?
Standard video at 30fps captures real-time conditions and is ideal for structural inspection and pavement analysis. Hyperlapse compresses time, making it invaluable for traffic flow studies, shadow movement analysis, and construction progress documentation. For a complete highway mapping package, capture both: use standard D-Log video on your primary mapping pass, then run a second pass in Hyperlapse mode at a higher altitude for contextual time-lapse data. The Neo 2 handles both modes without recalibration between passes.
Ready for your own Neo 2? Contact our team for expert consultation.