How to Map Dusty Construction Sites with Neo 2 While Staying
How to Map Dusty Construction Sites with Neo 2 While Staying Inside Real Aerial Survey Standards
META: A practical Neo 2 tutorial for dusty construction site mapping, grounded in low-altitude aerial photography standards, flight height limits, image quality requirements, and real-world interference handling.
Construction mapping looks simple right up until the site fights back.
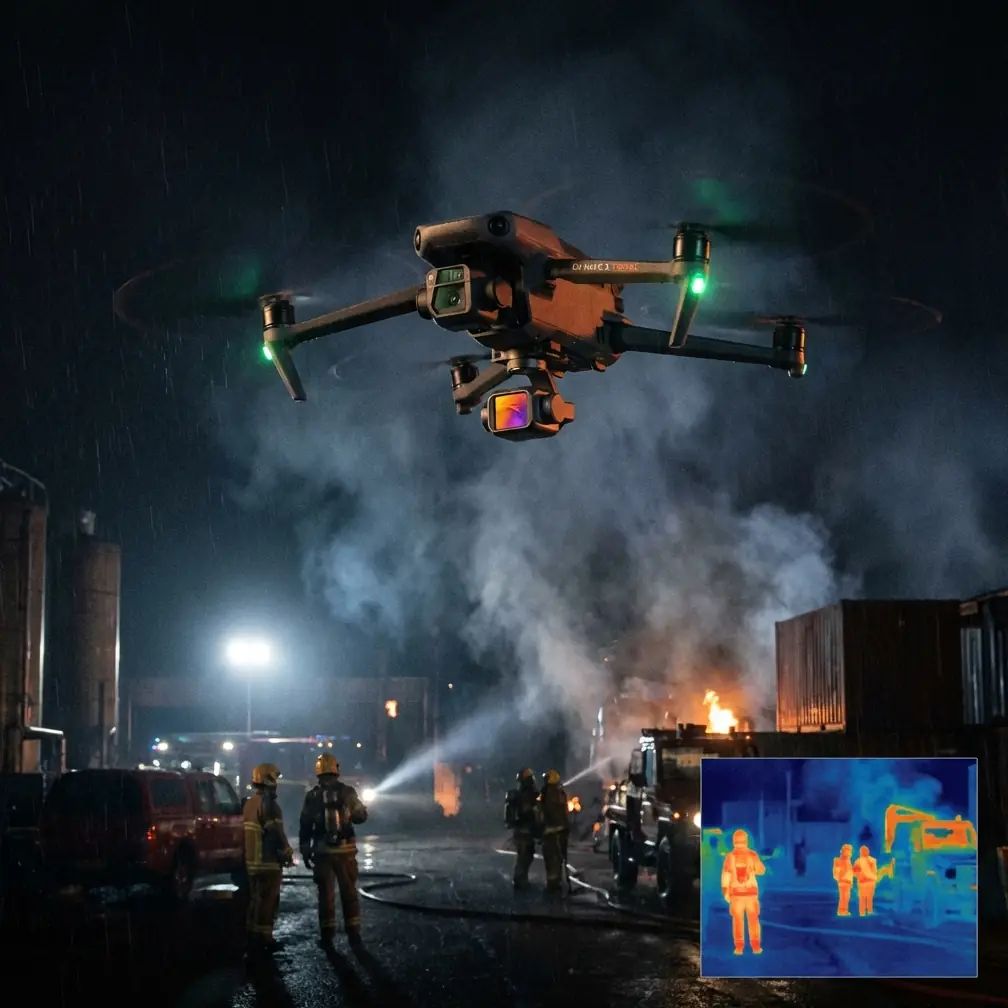
Dust hangs in the air. Steel frames throw off magnetic weirdness. GPS can drift near heavy equipment. Fine particles soften contrast, and every rushed flight decision shows up later as misalignment in the map. If you are planning to use Neo 2 on a dusty construction site, the real challenge is not getting airborne. It is getting data you can trust.
That is where the reference standard behind low-altitude digital aerial photography becomes useful. The Chinese standard 低空数字航空摄影规范 (CH/Z 3005-2010) was written for production-grade aerial photography, especially work aimed at mapping outputs such as 1:500, 1:1000, and 1:2000. Even if you are operating a compact modern platform like Neo 2 rather than a traditional survey aircraft, the underlying logic still matters: the aircraft system, the camera, the flight plan, the image quality, and the acceptance process all have to work together.
For a dusty construction site, that framework is more valuable than another generic “best settings” list.
Start with the standard, not the gadget
One of the most overlooked details in the reference material is that low-altitude aerial photography is treated as a system, not just a flying camera. The standard describes both ultra-light aircraft systems and unmanned aerial vehicle aerial photography systems, and in both cases it ties the work to a camera threshold of 20 megapixels or more.
Why does that matter for Neo 2 users? Because site mapping is not judged by how smooth the flight looked on screen. It is judged by whether the imagery supports measurable outputs. On a construction project, that usually means orthomosaics, progress records, stockpile checks, haul-road monitoring, drainage review, and earthwork comparisons over time. If your image set lacks enough detail, or if dust forces weak exposure and blurred edges, the model may still process, but the result becomes a pretty picture instead of a dependable site document.
So before you think about QuickShots, Hyperlapse, or cinematic D-Log passes for stakeholder updates, separate the mission into two parts:
- Mapping capture
- Visual communication capture
That distinction saves a lot of trouble. Mapping flights should prioritize overlap, consistency, and repeatability. Visual flights can use subject tracking, ActiveTrack, and cinematic motion after the survey dataset is complete.
Understand the flight height limits the right way
The standard includes two numbers that are operationally significant and easy to misuse.
It states that the relative flight height generally should not exceed 1,500 m, with an upper cap of 2,000 m. It also states that for plains and hilly areas, the aircraft platform ceiling should be at least 3,000 m above sea level, while platforms intended for mountainous or plateau regions should support at least 6,000 m elevation.
For a Neo 2 operator on a construction site, this does not mean you should fly anywhere near those relative heights. Quite the opposite. Those figures tell you the standard was built around maintaining technical capability across terrain types, while still controlling image geometry and image quality. In practical site mapping, your working altitude will be far lower. The takeaway is about discipline: keep your altitude appropriate for the map scale and the site’s detail requirements.
On dusty projects, lower is not always better either. Fly too low and rotor wash can kick up loose dust, reducing clarity in subsequent passes. Fly too high and you lose ground detail and edge definition on temporary works, rebar stacks, trench lines, and utility markings.
The sweet spot is usually the lowest altitude that gives you clean, repeatable coverage without stirring the site. You can only find that by testing over the actual surface conditions, not by copying someone else’s setting.
Dust changes exposure, focus, and confidence
Dust does more than make the site look hazy. It changes how your map behaves in processing.
Airborne dust reduces local contrast. That makes tie points less reliable, especially over uniformly colored fill, gravel pads, and unfinished slab surfaces. Dust on the lens is even worse, because the softening is consistent across the whole mission and often goes unnoticed until processing begins.
My working rule for Neo 2 on dusty sites is simple: treat the lens and prop wash as part of your mapping workflow.
Before takeoff:
- Inspect and clean the lens, even if it looks acceptable.
- Power up away from active vehicle routes and loader traffic.
- Avoid launch points on loose powdery soil when a compacted area or pad edge is available.
- Let the aircraft hover briefly and watch what the downwash does to the surface.
That last step tells you whether the launch point itself will sabotage image quality.
If the site is active, coordinate with the superintendent so your flight does not overlap with sweeping, crushing, excavation dumping, or truck surges in the target zone. A five-minute pause in dust-generating activity often improves the final map more than any post-processing trick.
Electromagnetic interference is real on construction sites
The context note about handling electromagnetic interference with antenna adjustment is not just a storytelling prompt. It is a real field issue.
Construction sites are full of interference sources: temporary power distribution, steel structures, site offices, generators, communications gear, parked equipment, reinforced concrete, and sometimes tower cranes. The result can be unstable heading, shaky signal quality, or warnings that make pilots second-guess an otherwise manageable mission.
With Neo 2, I handle this in three layers.
1. Choose the pilot position carefully
Do not stand directly beside generators, site containers, high-current cable runs, or large steel stacks. Move to an open line-of-sight position with a clear view of the aircraft’s route. This improves both transmission stability and your own situational awareness.
2. Adjust antenna orientation deliberately
If signal quality starts fluctuating, do not immediately blame the aircraft. Recheck how the controller antennas are aimed. Small orientation changes can make a noticeable difference when the site is cluttered with reflective or signal-disrupting materials. The mistake many operators make is pointing antenna tips at the drone. In most systems, proper broadside orientation works better. On a messy construction site, this can be the difference between a clean mapping run and a string of avoidable warnings.
3. Separate compass concern from transmission concern
Metal-heavy areas can disturb heading confidence even when video downlink remains fine. If the aircraft behaves oddly near structural steel or rebar staging zones, relocate the takeoff point and repeat the initial hover checks. Do not force the mission from a magnetically dirty launch area just because it is convenient.
This matters because mapping demands consistent geometry. A flight that “mostly works” can still produce uneven coverage if the platform drifts, pauses, or yaws unpredictably during image capture.
Obstacle avoidance helps, but don’t let it rewrite your survey
Neo 2 users often rely heavily on obstacle avoidance, and on a construction site that is reasonable. Towers, cables, partially erected structures, fencing, and moving plant create a changing environment. But for mapping, obstacle avoidance needs to be treated as a safety layer, not a planning substitute.
Why? Because route consistency affects the dataset. If the aircraft repeatedly brakes or deviates around protrusions, your overlap pattern may become irregular. In a promotional follow flight, that is acceptable. In a mapping mission, it can create weak spots in reconstruction.
My approach is to walk the site first and classify obstacles into two groups:
- Static obstacles: cranes, poles, containers, scaffold lines, stockpiles, towers
- Dynamic obstacles: trucks, excavators, concrete pumps, personnel traffic
Then I design the flight window around the dynamic activity, rather than expecting the aircraft to improvise around it. Obstacle avoidance is there for margin, not for mission design.
This is also where subject tracking and ActiveTrack should stay in their lane. They are useful for documenting moving machinery or creating progress content for project stakeholders. They are not your primary tool for survey-grade site mapping.
Use Neo 2’s creative modes after the map is secured
The context hints mention QuickShots, Hyperlapse, D-Log, and ActiveTrack. All of these can add value on a construction project, but only if they are used at the right stage.
Once the mapping mission is complete, Neo 2 can become a strong documentation tool:
- D-Log is useful when the site has harsh contrast, such as bright aggregate, reflective metal, and deep trench shadows. It preserves more flexibility for later grading in project reports or marketing updates.
- Hyperlapse can show phased progress over a haul road, foundation pour zone, or laydown yard.
- QuickShots help create short overview clips for non-technical stakeholders who need a fast sense of site status.
- ActiveTrack can follow a designated machine route for logistics analysis or training review, provided site safety and permissions are in place.
Just do not mix these objectives into the primary survey run. A map flight should feel boring. That is usually a sign it is being done correctly.
A repeatable site-mapping workflow for Neo 2
If I were training a new pilot named Jessica Brown on a dusty project, this is the sequence I would want her to memorize.
Step 1: Define the output first
Are you producing a progress orthomosaic, checking cut-and-fill evolution, documenting drainage works, or capturing a pre-pour condition record? The answer determines altitude, overlap, and site coverage.
Step 2: Walk the launch and recovery area
Check dust level, vehicle movement, steel density, overhead hazards, and radio interference clues. Find a stable, clear pilot position.
Step 3: Clean optics and test hover
A spotless lens is not optional. Hover long enough to judge dust disturbance and aircraft stability.
Step 4: Fly the mapping block consistently
Use a disciplined grid pattern with stable speed and altitude. Resist the temptation to dip for dramatic shots during the survey mission.
Step 5: Watch the signal, not just the screen
If transmission becomes unstable, pause and reassess antenna orientation and pilot position. If necessary, relocate rather than pushing through degraded conditions.
Step 6: Capture supplemental obliques only after nadir coverage
If the site has vertical structures or steep stockpiles, collect those deliberately as supplementary data, not as random extras.
Step 7: Use creative modes separately
After the survey dataset is complete, then switch to D-Log clips, Hyperlapse, QuickShots, or tracking sequences for reporting and communication.
Step 8: Review before leaving
Check for haze, dust softness, missed corners, and inconsistent exposure while still on site. A two-minute field review can prevent a wasted return trip.
Why this standard-based approach works
The real lesson from CH/Z 3005-2010 is not nostalgia for older survey practice. It is that reliable mapping has always depended on controlled inputs. The standard talks about system requirements, planning, flight quality, image quality, and acceptance because every one of those variables affects the final map.
On a dusty construction site, Neo 2 can be genuinely useful, but only if the operator thinks like a survey practitioner rather than a casual flyer. The 20-megapixel-class expectation in the reference reminds us that resolution matters. The 1:500 to 1:2000 mapping purpose reminds us that not every image set is suitable for measurable site outputs. The altitude and platform capability requirements remind us that aircraft performance and mission geometry are inseparable.
That is the difference between “we flew the site” and “we produced something the project team can rely on.”
If you are building a repeatable construction mapping workflow with Neo 2 and need help matching flight practice to deliverable quality, you can message a UAV workflow specialist here.
Ready for your own Neo 2? Contact our team for expert consultation.