Neo 2 for Urban Solar Farm Filming: How-To Guide
Neo 2 for Urban Solar Farm Filming: How-To Guide
META: Learn how to film stunning urban solar farm footage with the Neo 2 drone. Expert how-to guide covering ActiveTrack, D-Log, QuickShots, and obstacle avoidance tips.
TL;DR
- Pre-flight sensor cleaning is non-negotiable — dirty obstacle avoidance sensors cause erratic behavior near reflective solar panels
- D-Log color profile captures the full dynamic range of glass, metal, and sky in a single pass over urban solar arrays
- ActiveTrack and QuickShots automate complex cinematic moves that would otherwise require a two-person crew
- Hyperlapse mode compresses hours of shadow movement across panel rows into captivating time-based sequences
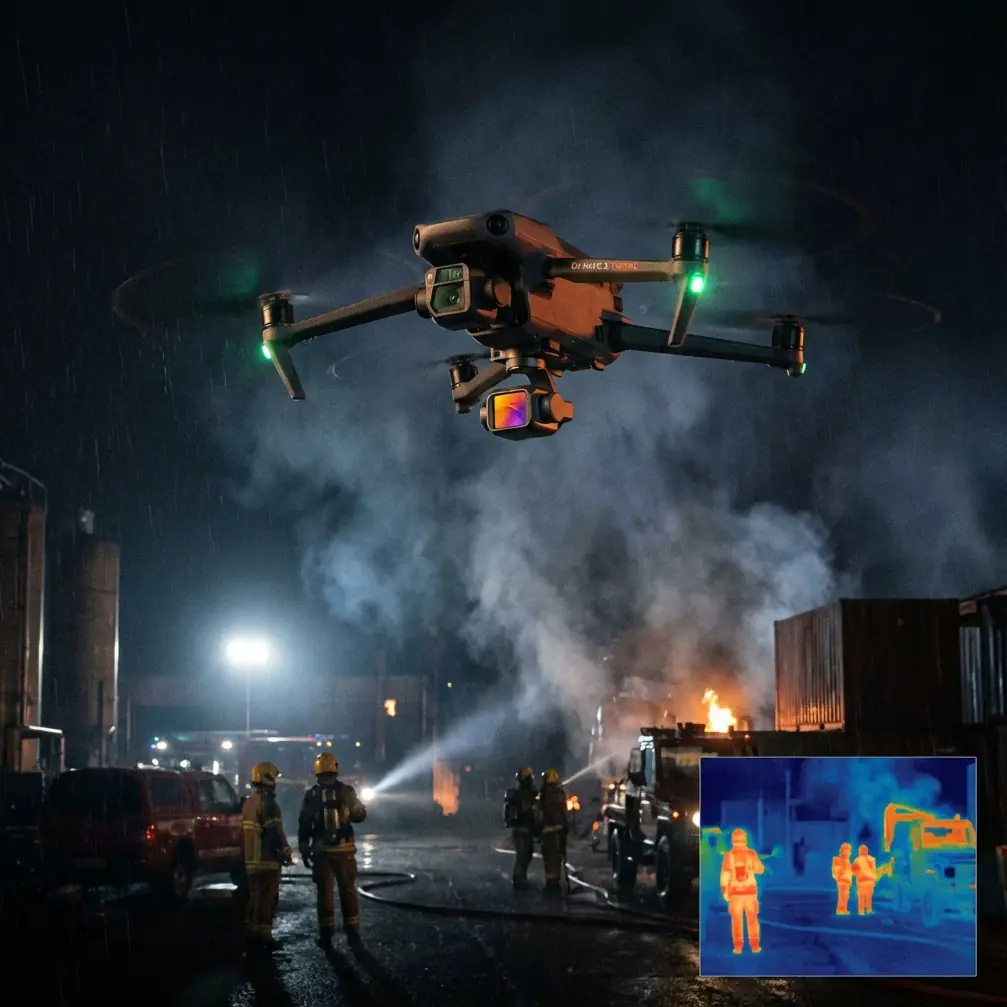
Why Urban Solar Farms Are Uniquely Challenging for Drone Pilots
Solar farms in urban environments present a collision of technical difficulties that most recreational drone scenarios never touch. You're dealing with highly reflective surfaces that confuse sensors, tight airspace near buildings, electromagnetic interference from inverters, and rapidly shifting light conditions as clouds pass over glass.
The Neo 2 is built to handle exactly this kind of complexity. Its advanced obstacle avoidance system, combined with intelligent subject tracking and professional-grade color science, makes it a go-to tool for photographers and videographers documenting solar infrastructure in cities.
This guide walks you through every step — from the pre-flight cleaning ritual that keeps your safety systems reliable, to the exact shooting modes and settings that produce broadcast-quality solar farm footage.
Step 1: The Pre-Flight Cleaning Protocol That Protects Your Shoot
Here's something most pilots skip, and it costs them. The Neo 2's obstacle avoidance sensors are optical. They rely on clean lenses to detect objects in the flight path. Urban environments coat these sensors with fine particulate matter — dust, pollen, vehicle exhaust residue — that degrades detection accuracy.
Before every solar farm shoot, follow this cleaning sequence:
- Power off the drone completely before touching any sensor surface
- Use a microfiber cloth (not compressed air, which can push debris into housings) on all forward, backward, downward, and lateral sensor windows
- Inspect the main camera lens and gimbal for smudges or moisture
- Check propeller edges for nicks that cause vibration-induced blur
- Wipe down the ventilation ports to prevent overheating during long flights over heat-radiating panels
Expert Insight: I once lost an entire afternoon of shooting because a thin film of morning dew on the downward-facing sensors caused the Neo 2 to register phantom obstacles at 2 meters above a panel array. The drone kept climbing autonomously. A 30-second wipe-down would have prevented it. Now I clean sensors before every single battery swap — not just the first flight of the day.
This step takes 60 seconds. It protects several thousand worth of equipment and ensures obstacle avoidance performs at full capability in an environment filled with reflective, low-contrast surfaces.
Step 2: Configure Obstacle Avoidance for Reflective Environments
The Neo 2's obstacle avoidance system uses vision sensors to map its surroundings in real time. Solar panels are problematic because their reflective surfaces can create false depth readings — the drone "sees" the sky reflected in the glass and misjudges distance.
Here's how to configure it properly:
- Enable APAS (Advanced Pilot Assistance System) in the flight settings — this allows the drone to autonomously reroute around detected obstacles rather than simply braking
- Set minimum altitude to 5 meters above panel surfaces to reduce reflection interference
- In tight urban layouts, switch obstacle avoidance to Brake mode instead of Bypass — you want full stops near buildings, not autonomous rerouting into restricted airspace
- Monitor the obstacle proximity radar on your controller screen continuously during low-altitude passes
The key principle: obstacle avoidance is a safety net, not autopilot. In urban solar environments, maintain manual awareness at all times.
Step 3: Master D-Log for High Dynamic Range Solar Footage
Urban solar farms create extreme contrast scenes. You have near-black shadows under panel arrays, blazing white reflections off glass surfaces, and mid-tone cityscapes in the background — sometimes all in a single frame.
D-Log is the Neo 2's flat color profile, and it's essential here. It captures approximately 10 stops of dynamic range, preserving detail in both highlights and shadows that standard color profiles crush.
D-Log Settings for Solar Farm Shoots
- ISO: 100 (always base ISO to minimize noise in shadow recovery)
- Shutter speed: double your frame rate (1/60 for 30fps, 1/50 for 25fps)
- Use ND filters — an ND16 or ND32 is typically necessary in full sun to maintain proper shutter speed
- White balance: manual at 5500K — auto white balance shifts between frames and creates color inconsistency in post
- Color profile: D-Log
The footage will look flat and desaturated on your monitor. That's correct. The latitude you gain in post-production is transformative — you'll pull detail out of panel reflections and shadow areas that would be pure white or pure black in a standard profile.
Step 4: Deploy ActiveTrack for Automated Panel Row Flyovers
ActiveTrack is the Neo 2's subject tracking engine, and it's remarkably effective for solar farm documentation. Rather than manually flying precise parallel lines over panel rows — which demands significant stick skill and often produces wobbly footage — you can lock ActiveTrack onto a visual reference point and let the drone maintain consistent framing.
How to set it up:
- Draw a selection box around a distinct visual anchor — a panel row edge, an inverter unit, or a maintenance walkway
- Select Trace mode to have the drone follow alongside or behind the target path
- Set flight speed to 3-5 m/s for smooth, cinematic motion
- Use ActiveTrack in combination with D-Log — the system handles flight path while you monitor exposure
Pro Tip: For linear solar arrays, I use a physical marker — a bright orange cone placed at the end of a panel row — as my ActiveTrack target. The high-contrast object gives the tracking algorithm a reliable lock point, even when surrounded by repetitive, visually similar panel geometry. This one trick eliminated 90% of my tracking drift issues.
Step 5: Create Dynamic Content with QuickShots and Hyperlapse
QuickShots and Hyperlapse are where the Neo 2 turns documentation into storytelling. These automated flight modes execute complex camera moves with a single tap.
Best QuickShots for Solar Farms
| QuickShot Mode | Best Use Case | Recommended Height | Notes |
|---|---|---|---|
| Dronie | Establishing shot of full array | 30-50 meters | Reveals scale of installation against city skyline |
| Rocket | Vertical reveal of panel rows | 10-40 meters | Dramatic upward pull showing geometric patterns |
| Circle | Highlight single inverter station | 8-15 meters | Orbit creates depth and dimensionality |
| Helix | Showcase array within urban context | 15-60 meters | Spiral combines orbit with altitude gain |
| Boomerang | Quick social media content | 10-30 meters | Curved flyover with automatic return |
Hyperlapse for Shadow Studies
Solar farm clients often want to visualize how shadows from surrounding buildings interact with panel placement throughout the day. Hyperlapse mode on the Neo 2 makes this effortless.
- Set Hyperlapse to Waypoint mode
- Program two waypoint positions at opposite ends of the array
- Set interval to 3 seconds with a total capture time of 20-40 minutes
- The Neo 2 will produce a stabilized, compressed time-lapse showing shadow migration across the installation
This single deliverable — a 10-15 second Hyperlapse showing shadow patterns — is often the most valuable piece of content for solar engineers evaluating panel placement efficiency.
Technical Comparison: Neo 2 Shooting Modes for Solar Farm Work
| Feature | Standard Video | D-Log Video | QuickShots | Hyperlapse |
|---|---|---|---|---|
| Dynamic Range | ~8 stops | ~10 stops | ~8 stops | ~8 stops |
| Pilot Skill Required | High | High | Low | Low |
| Post-Production Needed | Minimal | Significant | Minimal | Moderate |
| Best Deliverable | Inspection footage | Cinematic edits | Social media clips | Shadow studies |
| Obstacle Avoidance Active | Yes | Yes | Yes (limited) | Yes |
| ActiveTrack Compatible | Yes | Yes | No | No |
| Recommended ND Filter | ND8-16 | ND16-32 | ND8-16 | ND4-8 |
Common Mistakes to Avoid
Flying too low over panels without recalibrating sensors. Reflective surfaces at close range produce erratic obstacle avoidance responses. Maintain 5+ meters of clearance and clean sensors between flights.
Shooting in standard color profile on sunny days. You'll clip highlights on every panel reflection. D-Log exists for this exact scenario. Use it even if it means more post-production time.
Ignoring electromagnetic interference from inverters. Large solar inverters generate EMI that can trigger compass errors. Always calibrate the compass on-site before your first flight, and recalibrate if the drone drifts unexpectedly.
Using ActiveTrack on featureless panel surfaces. The algorithm needs contrast edges. Track a distinct object — a walkway, a railing, a marker — not the panels themselves.
Skipping the pre-flight sensor cleaning. This was covered extensively above, but it bears repeating. In urban environments with reflective infrastructure, dirty sensors are not a minor inconvenience — they are a safety hazard.
Running QuickShots without scouting the airspace first. QuickShots execute predetermined flight paths. If there's a radio tower, a crane, or overhead wiring that you didn't account for, the drone will fly toward it. Always perform a manual reconnaissance flight first.
Frequently Asked Questions
Can the Neo 2's obstacle avoidance reliably detect solar panels?
Yes, but with caveats. The vision-based obstacle avoidance system works well when panels are at an angle that returns a clear depth signal to the sensors. However, panels tilted to reflect open sky can create false distance readings. The solution is maintaining a minimum 5-meter buffer above panel surfaces and keeping all sensors clean. In low-light conditions — early morning or late afternoon — detection reliability actually improves because reflections diminish.
What's the best time of day to film urban solar farms with the Neo 2?
The golden hour windows — roughly 60 minutes after sunrise and 60 minutes before sunset — produce the most visually compelling footage. The low sun angle creates long shadows that emphasize panel geometry, reduces glare on glass surfaces, and bathes the surrounding urban landscape in warm light that contrasts beautifully with the cool blue-black tones of photovoltaic cells. For technical documentation and Hyperlapse shadow studies, midday flights between 10 AM and 2 PM provide the most useful data.
How do I handle restricted urban airspace when filming solar installations?
Urban solar farms frequently sit within controlled airspace zones — near airports, hospitals, or government buildings. Before every shoot, check airspace restrictions through your country's aviation authority app or platform. Obtain necessary waivers or authorizations in advance. The Neo 2's geofencing system will alert you to restricted zones, but regulatory compliance is the pilot's responsibility. Keep all flights below 120 meters AGL unless specifically authorized otherwise, and always maintain visual line of sight.
Filming urban solar farms demands a drone that balances intelligent automation with professional-grade imaging. The Neo 2 delivers both — from its ActiveTrack precision to its D-Log color science — giving photographers and videographers everything they need to produce compelling, technically accurate solar infrastructure content.
Ready for your own Neo 2? Contact our team for expert consultation.